
Adobe Audio Editing with Adobe Audition gives beginners access to a professional set of tools for recording, cleaning, editing, mixing and exporting sound. The software can be used for projects ranging from podcasts and interviews to voice-overs, video soundtracks, music recordings and sound effects.
At first, Adobe Audition can look complicated. The interface contains waveforms, tracks, effects, meters and technical terminology such as EQ, compression, sample rate and loudness. Beginners do not need to master everything immediately.
A more effective approach is to learn the basic audio workflow first: record or import clean material, remove unwanted sections, correct obvious problems, balance levels, apply processing only where it improves the sound and export the finished audio in a suitable format.
This guide explains how to use Adobe Audition, the main features of the Adobe Audition software, important audio production skills, practical editing techniques and the kinds of skills you can learn with Adobe Audition. It also provides a structured learning path for anyone considering an Adobe Audition tutorial or formal training.
What Is Adobe Audition?
Adobe Audition training Audition is a digital audio workstation, usually shortened to DAW. A digital audio workstation is software used to record, edit, mix and process sound.
Adobe Audition training describes it as a professional audio workstation for recording, editing, mixing, restoring and designing audio. In other words, it provides a complete environment for managing and improving digital sound.
Unlike Adobe Premiere Pro, which is primarily designed around video editing, Audition concentrates specifically on audio and sound production.
That makes it useful for tasks such as:
- editing spoken-word recordings;
- cleaning noisy dialogue;
- producing podcasts;
- recording voice-overs;
- mixing several audio sources;
- processing music;
- creating sound effects;
- preparing audio for video;
- repairing damaged recordings.
Audition is part of Adobe’s wider creative software ecosystem, meaning it can work alongside Premiere Pro and other Adobe Audition training applications.
For a beginner, however, there is no need to start with complex integration. Learning Audition as a standalone audio editor provides a much clearer starting point and foundation.
Adobe Audio Editing: Understanding the Basic Workflow
Most audio projects can be understood as a sequence or series of stages.
First, you capture or obtain the recording. Then you organise and edit it. Next, you improve or enhance the sound where necessary. After that, you balance the different elements. Finally, you export the completed file.
A typical workflow might therefore look like:
Record → Edit → Repair → Process → Mix → Check → Export
The exact sequence or order varies depending on the project.
For example, a podcast editor may remove mistakes before reducing noise. A music project may involve recording several tracks before substantial editing begins.
The important principle is to work deliberately and systematically rather than randomly applying effects until the audio simply sounds different.
Waveform Editor vs Multitrack Editor
One of the first concepts beginners should understand is the difference between Audition’s two major editing environments or workspaces.
Waveform Editor
The Waveform Editor focuses primarily on an individual audio file.
It displays the sound visually as a waveform, providing a graphical representation of the recording.
This environment is useful for detailed tasks such as:
- removing unwanted sections;
- adjusting amplitude or signal level;
- repairing individual noises;
- applying processing to a file;
- converting sample formats;
- examining spectral information.
The waveform represents changes in audio amplitude across time.
Large peaks generally indicate stronger signal levels, while quieter areas appear closer to the centre line.
A major point to understand is that many changes made directly in the Waveform Editor alter the underlying or original audio file. Beginners should therefore work carefully and maintain backups or use suitable saving practices.
Multitrack Editor
The Multitrack Editor is designed for arranging and mixing multiple audio clips or sources.
Imagine a podcast containing:
Track 1: presenter;
Track 2: guest;
Track 3: background music;
Track 4: introduction sound effect.
The Multitrack Editor allows these elements to be arranged separately and mixed together.
This is particularly useful because many edits and effects in a multitrack session are non-destructive, meaning you can adjust the mix without permanently changing the original source recordings.
For most podcast, video-audio and multi-source projects, beginners should become comfortable with both editing environments.
Understanding Waveforms
A waveform is a visual or graphical representation of audio.
The horizontal direction represents time, while the vertical dimension represents amplitude or signal strength.
Beginners sometimes make the mistake of judging audio only by how the waveform looks.
A large waveform is not automatically good, and a smaller waveform is not necessarily bad.
You need to listen as well as look.
Waveforms are useful for identifying:
- silence;
- obvious edits;
- sudden peaks;
- speech sections;
- clipping;
- timing problems.
Audition also provides more advanced methods for inspecting sound through its spectral-frequency display.
Spectral Frequency Editing
The normal waveform shows amplitude over time.
The spectral display, by comparison, shows the frequency content of the sound across time.
This can reveal details that are much harder to identify from the waveform alone.
For example, unwanted sounds such as a cough, click or high-frequency noise may appear as visible patterns within the spectrum.
Adobe Audition training specifically identifies spectral editing as useful for isolating and removing unwanted audio artefacts or imperfections.
This is one of the more distinctive skills you can learn with Adobe Audition training as you progress beyond basic cutting and trimming.
Spectral repair still requires judgement. Removing too much material can create unnatural or artificial sound, so beginners should make conservative changes and listen carefully to the result.
How to Use Adobe Audition for a Basic Audio Project
Learning how to use Adobe Audition training is easiest through a simple project.
Imagine you have recorded a five-minute voice-over and want to prepare or refine it for publication.
Step 1: Import the Recording
Open Audition and import the audio file.
Before editing, listen through the recording.
Do not immediately start applying noise reduction or compression. First identify the actual problems.
You might notice:
- long pauses;
- mistakes;
- mouth noises;
- background noise;
- uneven volume;
- harsh sibilance.
Understanding the problems helps you choose the appropriate tools and techniques.
Step 2: Remove Unwanted Material
Use the editing tools to remove obvious mistakes and unnecessary silence.
Do not make cuts so tight that speech sounds unnatural.
Natural spoken language contains small pauses and breaths. Removing all of them can create an artificial or overly processed result.
Listen around every edit rather than assuming it works simply because the waveform looks tidy.
Step 3: Check the Recording Level
Look for obvious clipping.
Digital clipping occurs when a signal exceeds the maximum available level and becomes distorted.
Severely clipped audio can be difficult or impossible to restore completely.
This highlights one of the central lessons of audio production:
good recording technique is better than relying on repair afterwards.
Step 4: Reduce Noise Where Necessary
If there is persistent or continuous background noise, Audition includes several restoration options.
Adobe Audition training current Essential Sound controls can reduce:
- background noise;
- low-frequency rumble;
- electrical hum;
- excessive sibilance.
Audition also provides more advanced noise-reduction and restoration effects.
Use these tools conservatively and carefully.
Excessive noise reduction can make voices sound metallic, watery or unnatural.
The objective is usually to make unwanted noise less distracting rather than to force every silent section into absolute digital silence.
Step 5: Apply EQ
EQ means equalisation or frequency balancing.
It allows you to adjust different frequency ranges within a recording.
For example, a recording may contain excessive low-frequency rumble or sound overly harsh at certain higher frequencies.
EQ can help rebalance and refine these areas.
Beginners should avoid copying dramatic EQ settings from an online tutorial without understanding why they are being used.
Different voices, microphones and recording rooms produce different results.
Listen to the actual audio and make changes for a clear reason.
Step 6: Use Compression Carefully
Compression reduces differences between louder and quieter parts of an audio signal.
It is commonly used for speech, music and broadcast production.
Applied appropriately, compression can make dialogue feel more controlled and consistent.
Applied excessively, it can make audio sound flat, aggressive or unnaturally loud.
Beginners should learn what threshold, ratio, attack and release mean gradually rather than immediately using extreme settings.
Step 7: Check Loudness
Volume peaks and perceived loudness are not the same thing.
Audition includes loudness-measurement and matching tools and supports standards such as EBU R128 and ITU BS.1770.
Do not assume every podcast, video or broadcaster wants exactly the same output specification.
Check the delivery requirements for the platform or client concerned.
Step 8: Export the Finished File
When the edit is complete, export the audio in a format appropriate for its destination.
Adobe Audition training supports multiple output formats.
The correct choice depends on whether you are creating:
a master file;
a podcast;
audio for video;
music;
an archive;
a client delivery.
Keep a high-quality master where appropriate rather than repeatedly converting compressed files.
Recording Audio in Adobe Audition
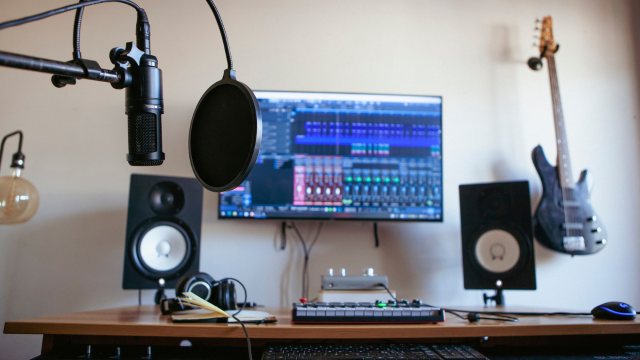
Audition can record audio directly from microphones and other connected audio devices.
Adobe Audition training current documentation supports recording in both Waveform and Multitrack environments.
For reliable results, recording quality should be addressed before editing starts.
Choose a Suitable Environment
Room acoustics matter.
A very reflective room can create noticeable echo.
Traffic, computer fans, air conditioning and outside conversations may also be recorded.
A basic microphone in a controlled environment can sometimes produce a more usable result than expensive equipment in a poor room.
Set Input Levels Properly
Do not record so quietly that the useful signal is overwhelmed by noise.
Equally, do not push the input so high that peaks clip.
Monitor levels while the person speaks at realistic performance volume.
Position the Microphone Carefully
Microphone position influences tone and background-noise pickup.
For speech, distance should remain reasonably consistent.
A pop filter can also help reduce plosive sounds generated by letters such as “p” and “b”.
These are recording skills rather than software features, but they have a major effect on the amount of editing required later.
Cleaning Dialogue With Essential Sound
Audition’s Essential Sound panel gives less experienced users a simplified way to approach common processing tasks.
Audio can be identified as:
Dialogue;
Music;
SFX;
Ambience.
When Dialogue is selected, Audition provides tools for operations including loudness matching, repair and clarity adjustments.
Reduce Noise
This can suppress unwanted background noise.
Use enough to improve intelligibility without damaging the voice.
Reduce Rumble
Low-frequency rumble may come from handling noise, equipment or environmental vibration.
Audition includes controls specifically intended to reduce these low-frequency problems.
DeHum
Electrical interference may create a constant hum.
Adobe Audition training documentation notes that mains-related hum often centres around 50 Hz in regions including Europe, Asia and Africa and 60 Hz in North and South America.
The DeHum function can help address this kind of noise.
DeEss
Sibilance occurs when sounds such as “s” become unpleasantly sharp.
De-essing reduces excessive high-frequency sibilance while trying to maintain natural speech.
Again, moderation matters.
Using Music Under Dialogue
Podcasts, videos and promotional content often place music underneath speech.
Simply reducing the music volume manually can work, but Audition also provides automatic ducking.
Ducking reduces music or ambience while dialogue is present and allows it to rise again where appropriate.
Adobe’s Essential Sound panel provides controls for sensitivity,Adobe Audition training reduction amount and fade behaviour.
This can save editing time, but it should still be checked by ear.
Automatic processing may not make the best creative decision at every moment.
Important Audio Production Skills
Adobe Audition training Learning software shortcuts is useful, but genuine audio production skills go much further.
Critical Listening
Good editors learn to hear problems.
Can you identify hum?
Is a recording too reverberant?
Does compression sound unnatural?
Is speech difficult to understand because music is masking it?
Critical listening develops through practice.
Gain Staging
Gain staging means maintaining sensible signal levels through different stages of a recording and mix.
Poor gain structure can increase noise or create clipping.
Editing
Precise editing involves timing as well as cutting.
Dialogue should flow naturally after mistakes, Adobe Audition training pauses and repeated words are removed.
EQ
Editors should understand frequency ranges rather than simply using presets.
Dynamic Processing
Compression, limiting and related tools influence differences between loud and quiet sections.
Noise Reduction and Restoration
Editors should know when noise can reasonably be reduced and when poor source material imposes limits.
Mixing
Mixing involves balancing dialogue, music, effects and ambience so that each serves the project.
Loudness and Delivery
Finished material may need to comply with particular broadcast, streaming or client requirements.
Understanding loudness measurement becomes increasingly valuable in professional workflows.
Adobe Audition for Podcast Editing
Audition is well suited to spoken-word production.
A simple podcast workflow might involve recording participants on separate tracks, removing mistakes, reducing distracting noise, balancing voices, applying appropriate EQ and compression, adding music and then producing a final mix.
Adobe provides dedicated guidance for podcast creation and even offers Podcast Voice presets.
Presets can be useful starting points, but they should not replace critical listening.
Two podcast voices can require very different processing.
Adobe Audition for Video Production
Audition is also designed to support audio finishing for video.
Video editors often need to:
clean dialogue;
balance interviews;
add ambience;
mix music;
repair unwanted sounds;
prepare a final soundtrack.
Adobe Audition training specifically positions Audition for video-production workflows.
For someone already using Premiere Pro, learning Audition can therefore broaden their ability to handle difficult audio beyond basic video-editor controls.
Adobe Audition for Music
Audition can record and mix music, but it is important to understand its positioning.
It is a capable multitrack audio workstation, but musicians whose main requirement is MIDI sequencing, virtual instruments or complex electronic music production may prefer DAWs designed more heavily around those workflows.
Audition’s particular strengths include waveform editing, audio restoration, dialogue work, sound design and precision editing.
The best software therefore depends on the project.
Common Adobe Audio Editing Mistakes

Applying Effects Before Listening
Beginners often assume every recording needs noise reduction, EQ and compression.
It does not.
Listen first.
Process only what needs improvement.
Overusing Noise Reduction
Aggressive noise processing can create unpleasant digital artefacts.
Some background noise may sound more natural than heavily damaged dialogue.
Making Everything Too Loud
Louder is not automatically better.
Maintain appropriate dynamics and follow the required loudness specification.
Editing Every Breath
Not every breath needs removing.
Human speech should still sound human.
Relying Entirely on Presets
A preset cannot know how your recording was made.
Use presets as starting points and then listen critically.
Ignoring the Original Recording
Editing cannot fully compensate for poor microphone placement, severe clipping or extreme room echo.
Capture clean audio whenever possible.
Exporting Without Checking
Listen through the final file.
Check the beginning, end, edits, music levels and any sections where processing changed significantly.
How to Learn Adobe Audition
A beginner does not need to learn the entire Adobe Audition training software at once.
A sensible progression is:
Stage 1: Learn Basic Editing
Practise:
importing files;
waveform navigation;
cutting;
copying;
fading;
adjusting levels;
exporting.
Stage 2: Learn Multitrack Editing
Create projects containing dialogue and music.
Practise moving clips, setting fades and balancing tracks.
Stage 3: Learn Audio Repair
Explore:
noise reduction;
DeHum;
DeEss;
spectral editing;
click removal.
Stage 4: Learn Processing
Develop an understanding of:
EQ;
compression;
limiting;
reverb.
Do not just memorise settings. Learn what each processor changes.
Stage 5: Learn Loudness and Delivery
Understand meters, peak levels and loudness standards.
Export projects for different intended destinations.
Stage 6: Complete Real Projects
Create a short podcast.
Edit an interview.
Clean a noisy voice recording.
Build a video soundtrack.
Real projects expose problems that isolated exercises often miss.
Adobe Audition Training vs Independent Learning
There are several ways to learn Audition.
Adobe Audition training provides official documentation, while video tutorials and practical projects can help demonstrate techniques.
Structured Adobe Audition training can be useful for learners who prefer information organised into a sequence.
When evaluating training, consider whether it covers:
recording;
Waveform editing;
Multitrack editing;
noise restoration;
EQ and compression;
mixing;
loudness;
exporting;
practical exercises.
Career Education currently offers Adobe Audition CC – Audio for Everyone as a self-paced online learning option.
Its publicly accessible product page currently provides limited Audition-specific syllabus and assessment information, so learners should review the latest course materials before purchasing.
More importantly, completion of a short course should not be considered automatic proof of professional audio competence.
Practical skill develops through editing varied recordings, solving genuine audio problems and receiving feedback.
Adobe Audition Tutorial: A Good Beginner Practice Project
A practical Adobe Audition training tutorial project can be created with only three audio elements:
one spoken recording;
one music track;
one sound effect.
Import the voice recording and remove obvious mistakes.
Clean distracting noise carefully.
Use light EQ or compression only if the recording requires it.
Create a Multitrack session.
Place the voice on one track and music on another.
Fade the music in at the beginning.
Lower or duck it under the voice.
Add the sound effect at an appropriate point.
Check levels and listen through the full project.
Finally, export a completed mix.
This small exercise teaches several foundational skills without overwhelming a beginner.
Skills You Can Learn With Adobe Audition
The skills you can learn with Adobe Audition can extend beyond knowledge of the interface.
Regular practice can help develop:
audio editing;
critical listening;
dialogue cleanup;
multitrack organisation;
sound restoration;
mixing;
effects processing;
loudness awareness;
audio export;
production workflow.
These are transferable concepts.
If you later move to another DAW, principles such as EQ, compression, signal level, noise control and mixing still apply even though the buttons may be different.
That is why learning concepts is ultimately more valuable than memorising the interface.
Frequently Asked Questions
What is Adobe Audition used for?
Adobe Audition is used for recording, editing, mixing, restoring and processing audio. Common applications include podcast editing, voice-over work, dialogue cleanup, video sound, sound effects and music-related audio editing.
Is Adobe Audition suitable for beginners?
Yes, although the full interface can initially seem complex. Beginners can start with basic Waveform editing, simple Multitrack projects and the Essential Sound panel before learning advanced restoration and effects.
What is the difference between Waveform and Multitrack editing?
The Waveform Editor is mainly designed for detailed editing of individual audio files. The Multitrack Editor allows multiple clips and tracks to be arranged, processed and mixed together, making it suitable for podcasts, music and video-audio projects.
Can Adobe Audition remove background noise?
Audition provides several tools for reducing unwanted noise, including Essential Sound controls, noise-reduction effects and spectral editing. Results depend on the source recording, and excessive processing can damage the wanted audio.
Can Adobe Audition edit podcasts?
Yes. Audition supports multitrack recording and editing, dialogue repair, EQ, compression, music ducking and other features that are useful in podcast production.
Is Adobe Audition good for music production?
Audition can record, edit and mix music, but the best DAW depends on the intended workflow. Producers who rely heavily on MIDI, virtual instruments or electronic composition may prefer software focused specifically on those areas.
What audio production skills should beginners learn first?
Begin with clean recording, waveform editing, gain control, basic EQ, compression, noise reduction, multitrack mixing and correct exporting. Critical listening should develop alongside every technical skill.
Can Adobe Audition repair bad audio completely?
No. It can improve many problems, including noise, hum and isolated artefacts, but severely clipped, distorted or poorly recorded audio cannot always be restored fully. Recording well at the source remains important.
Do I need Adobe Audition training to use the software?
Not necessarily. Adobe documentation, tutorials and independent projects can provide a learning route. Structured training may help learners who want a defined sequence, but practical experience is necessary regardless of the learning method.
Does learning Adobe Audition make me a professional audio editor?
No single course or software skill automatically establishes professional competence. Professional audio work also requires critical listening, production judgement, experience with different recordings, understanding of delivery standards and the ability to solve problems reliably.
Conclusion
Adobe Audio Editing provides beginners with a powerful route into recording, repair, mixing and audio production.
The Adobe Audition software combines Waveform and Multitrack editing with spectral-frequency tools, noise restoration, effects, loudness measurement and flexible export options. That makes it useful for podcasts, dialogue, video sound, voice-over projects and many other audio workflows.
For anyone learning how to use Adobe Audition, the best approach is progressive. Start with recording and simple edits. Move into Multitrack sessions, then develop your understanding of EQ, compression, noise reduction, spectral editing and loudness.
The most valuable skills you can learn with Adobe Audition are not merely knowledge of menus and shortcuts. Strong audio production skills include critical listening, careful editing, appropriate processing, clean recording and the ability to deliver sound that suits its intended purpose.
An Adobe Audition tutorial or structured Adobe Audition training programme can help introduce those concepts, but real competence develops through practice. Edit different voices, repair imperfect recordings, mix music with dialogue and critically review the results.
Once those underlying principles become familiar, Adobe Audition stops looking like a collection of technical controls and starts becoming what it is designed to be: a practical workspace for shaping sound deliberately and accurately.